

Cart
0
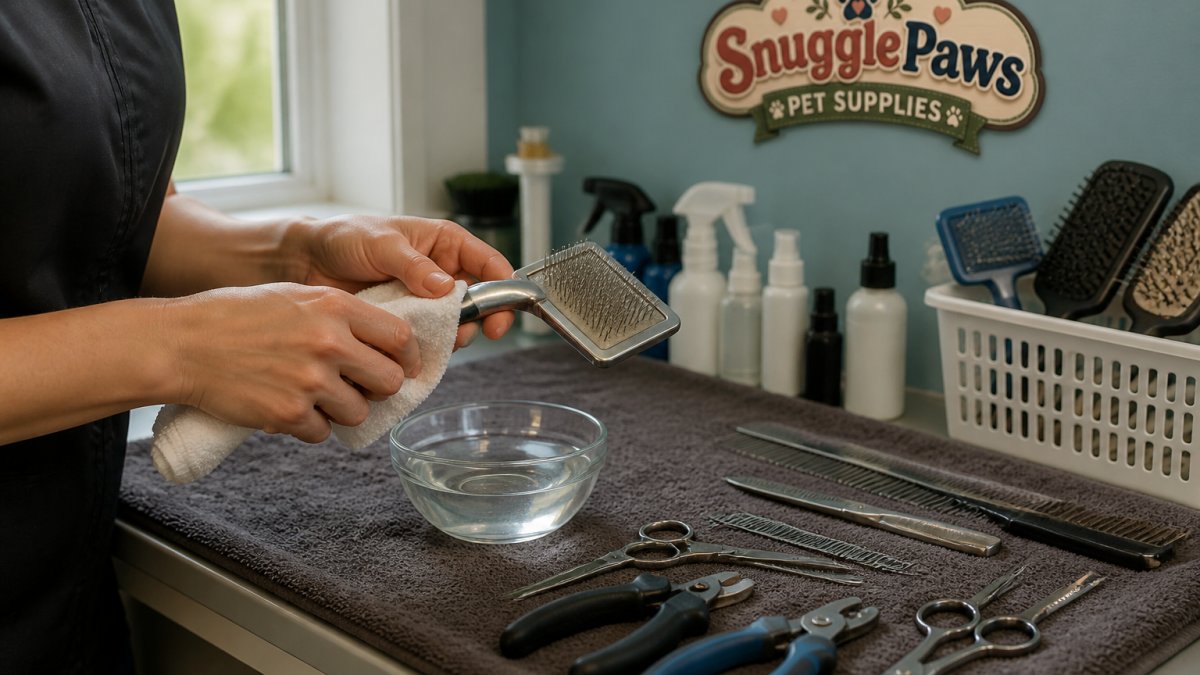
Table of Contents
- What You'll Need Before Starting
- How to Clean Dog Grooming Clippers After Every Use
- Pet Grooming Tool Disinfection Guide
- Best Way to Sharpen Grooming Shears and Maintain Blade Edge
- Rust Prevention and Lubrication for Tool Longevity
- Storage Solutions for Your Grooming Kit
- Common Mistakes to Avoid When Maintaining Grooming Tools
- Frequently Asked Questions
Last Updated: September 30, 2026
What You'll Need Before Starting
To maintain pet grooming tools properly, you need the right supplies. Gather a basic kit before starting your cleaning and maintenance routines.

Essential items include a cleaning brush (most grooming tools come with one), soft cloths or microfiber towels, and a disinfectant suitable for pet grooming equipment. Blade oil or lubricant designed for grooming tools prevents rust and keeps blades moving smoothly. A small container of styptic powder helps stop minor bleeding if needed during grooming sessions.
Store supplies in a dry container, a drawer organizer or dedicated grooming kit bag works well. Keep everything together in one location.
| Supply | Purpose | Frequency |
|---|---|---|
| Cleaning brush | Remove hair and debris | After each use |
| Soft cloth | Dry and polish blades | After each use |
| Blade oil | Lubricate and prevent rust | 2-3 times weekly |
| Disinfectant | Kill bacteria and germs | Weekly or after heavy use |
| Styptic powder | Stop minor bleeding | As needed |
How to Clean Dog Grooming Clippers After Every Use
Clean tools immediately after grooming. Hair, dander, and skin oils cause rust, dullness, and bacterial growth; debris hardens over time and becomes harder to remove.
Removing Hair and Debris
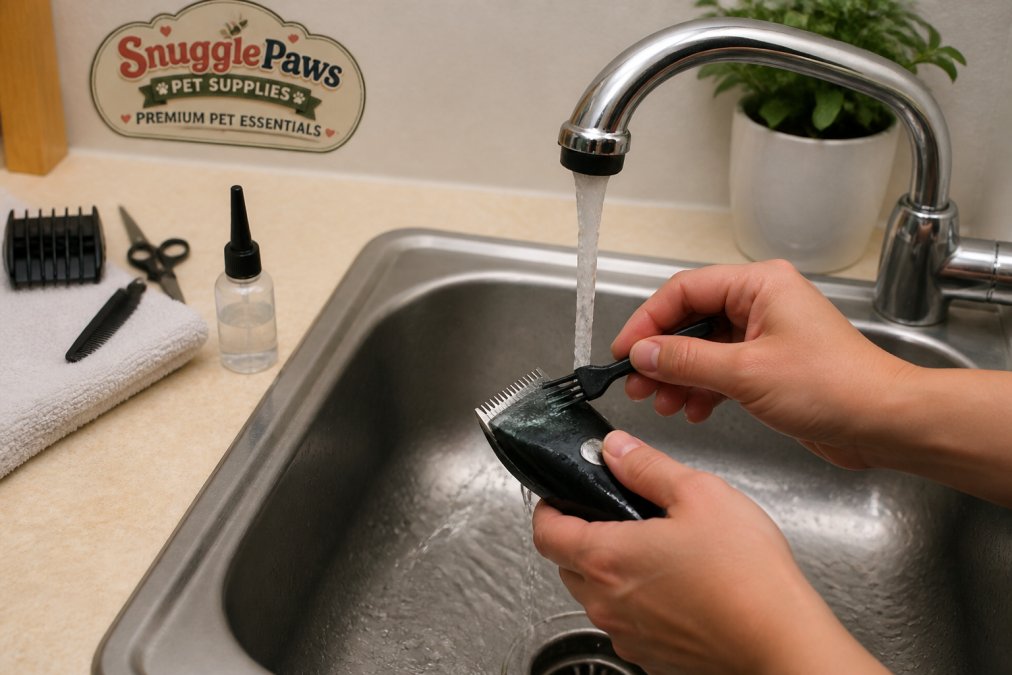
Use the included cleaning brush to remove visible hair and debris from blade edges and crevices. Hold the clipper head over a trash can and use short, deliberate strokes to dislodge stubborn hair between blades.
For electric clippers, never submerge the motor housing. Clean the blade head only. Detach removable blades to access hard-to-reach areas.
Pay special attention to spaces between fixed and moving blades, where hair accumulates and restricts movement. Use a small brush or old toothbrush for tight spots.
Washing and Drying
Rinse the blade under warm running water and wipe clean with a soft cloth. Never use hot water, as it damages blade alignment and internal components.
Pat blades completely dry with a clean, lint-free cloth. Moisture promotes rust and corrosion; this step takes under a minute but significantly extends tool life.
Use a cloth corner to reach crevices and ensure no water droplets remain. Air dry briefly before storing.
Pet Grooming Tool Disinfection Guide
Cleaning removes visible debris; disinfection kills bacteria, fungi, and viruses. Both steps matter for safe, hygienic tool maintenance.
Sterilization vs. Cleaning vs. Disinfection
Cleaning removes dirt and hair using brushes, cloths, and water after every session. Disinfection kills most bacteria, fungi, and viruses using chemical solutions or heat, practical for home use. Sterilization eliminates all microorganisms via autoclave (250-275°F, 15-30 minutes) and is used by professionals; home owners rarely need it unless grooming multiple households or pets with active infections.
For home grooming of a single pet or household pets without active infections, disinfection is sufficient and practical.
Disinfection Methods and Products
Clean tools first, then disinfect. Debris blocks disinfectant from reaching all surfaces.
Chemical Disinfection (Most Common for Home Use)
Common options include quaternary ammonium sprays (30 seconds-2 minutes contact time), 70% isopropyl alcohol (quick-drying, safe for stainless steel), bleach solution 1:10 (effective but corrosive to carbon steel; use only on stainless steel and rinse after 1-2 minutes), and enzymatic disinfectants (useful for dried-on debris).
Spray or wipe all blade surfaces, handles, and crevices. Let sit per product instructions, then wipe thoroughly and air dry.
For electric tools, spray the cloth instead of spraying directly on the motor or battery to prevent water damage.
Heat Disinfection (Alternative for Home Use)
Boil removable stainless steel blades for 10-15 minutes to kill pathogens without chemicals. Cool and dry completely before reattaching. Do not boil electric clipper heads or tools with electronic components.
Disinfection Schedule
- After every grooming session: Quick rinse and dry with a clean cloth (removes debris and reduces microorganism load).
- Weekly or after grooming multiple pets: Full chemical disinfection of all tool surfaces.
- After grooming a pet with skin infection, fungal condition, or open wounds: Immediate full disinfection; consider boiling removable blades if possible.
- Monthly: Deep disinfection of all grooming supplies, including storage containers and cleaning brushes.
Disinfectant Safety and Storage
Store disinfectants in a cool, dry place away from sunlight and out of reach of children and pets. Check shelf life, follow manufacturer instructions, wear gloves with concentrated products, and ensure good ventilation with sprays.
Best Way to Sharpen Grooming Shears and Maintain Blade Edge
Dull blades pull hair, cause discomfort and skin irritation, and require more pressure. Sharp blades make grooming faster and easier.
Professional sharpening services extend tool life.
Proper lubrication and careful handling prevent dulling.
Use grooming shears only on pet hair. Using them on mats, tangles, or other objects dulls blades quickly. Keep them separate from general-purpose scissors.
Store shears in a protective case or sheath to prevent blade-to-blade contact, accidental damage, and moisture exposure.
Rust Prevention and Lubrication for Tool Longevity
Rust develops when metal contacts moisture and oxygen. Prevention is easier than removal. Different blade materials require different lubrication.
USB Rechargeable Pet Nail Grinder And →
Understanding Your Blade Material
Stainless Steel Blades
Stainless steel resists rust naturally but can corrode with chlorine, salt, or prolonged moisture. It requires less frequent oiling than carbon steel but benefits from regular lubrication.
Carbon Steel Blades
Carbon steel holds a sharper edge longer but rusts easily without protection. It requires consistent oiling and dry storage. Common in professional-grade tools.
Ceramic Blades
Ceramic doesn't rust and requires minimal lubrication. It stays sharp longer and runs cooler, ideal for sensitive skin. However, it's brittle and can chip if dropped.
Lubrication Schedule by Tool Type and Usage
Daily Grooming (5+ hours per week)
- Clipper blades: Oil after each grooming session (daily).
- Shears and scissors: Oil 2-3 times daily or between each pet.
- Nail grinders: Oil the head mechanism after each use.
Moderate Grooming (2-5 hours per week)
- Clipper blades: Oil 3-4 times weekly.
- Shears and scissors: Oil 2-3 times weekly.
- Nail grinders: Oil 2-3 times weekly.
Light Grooming (Less than 2 hours per week)
- Clipper blades: Oil 1-2 times weekly.
- Shears and scissors: Oil weekly.
- Nail grinders: Oil weekly.
Extended Storage (Not in use for 2+ weeks)
- Apply a light coat of blade oil to all metal surfaces before storing.
- Re-oil every 2-4 weeks even if tools are not in use.
Proper Oiling Technique
Use blade oil or clipper oil designed for grooming tools. General-purpose oils can gum up, attract dust, or damage alignment.
Clipper blades: Apply 2-3 drops along the top edge and between blades, run for 10-15 seconds, wipe excess. Shears: Apply 1-2 drops to the pivot point, open/close 5-10 times, wipe excess. Nail grinders: Apply 1-2 drops to the head mechanism, run 10 seconds, wipe excess.
Avoid over-oiling; excess attracts hair and dust, clogging mechanisms.
Rust Prevention Storage Conditions
Store tools in a dry location away from bathrooms and kitchens. Ideal conditions: 60-75°F, below 50% humidity, away from direct sunlight.
In humid climates (>60% humidity), store tools in a sealed container with silica gel packets (replace every 2-4 weeks), use a dehumidifier, or store in a climate-controlled closet.
Identifying and Removing Early-Stage Rust
Check tools weekly for early signs of rust or discoloration. Catching rust early makes it easier to address.
Surface Rust (Light Discoloration)
Surface rust appears as light brown or orange spots on the blade surface. It has not yet pitted the metal.
- Clean the blade thoroughly with a soft cloth and warm water.
- Apply blade oil and rub the rusted area with a clean cloth using circular motions.
- For stubborn surface rust, use a soft brass brush or fine steel wool (0000 grade) to gently scrub the affected area.
- Wipe clean and apply a fresh coat of blade oil.
- Store in a dry location and monitor for recurrence.
Pitted Rust (Deep Corrosion)
Pitted rust has created small holes or indentations in the blade surface.
- Do not attempt to remove pitted rust at home.
- Contact the tool manufacturer for repair options.
- In many cases, blade replacement is more cost-effective than restoration.
Prevention is Easier Than Repair
A few minutes of weekly maintenance prevents rust before it starts. Consistent oiling, dry storage, and prompt drying after cleaning keep tools rust-free for years. Tools that rust frequently may indicate storage in a humid environment; address the storage location before replacing the tools.
Storage Solutions for Your Grooming Kit
Proper storage protects tools from damage, moisture, and dust. A well-organized kit also saves time when you're ready to groom.
Common Mistakes to Avoid When Maintaining Grooming Tools
Pet owners often make maintenance errors that shorten tool lifespan. Learning what not to do saves money and frustration.
Frequently Asked Questions
How do you disinfect pet grooming tools properly?
Disinfect grooming tools by first removing all hair and debris with a cleaning brush, then wiping blades with rubbing alcohol or a pet-safe disinfectant. For electric tools like nail grinders, wipe the head only, avoid submerging. Allow tools to air dry completely before storage. Regular disinfection prevents bacteria growth and maintains pet hygiene during grooming sessions.
How often should you sharpen dog grooming shears?
Sharpen grooming shears every 3 to 6 months, depending on how frequently you use them. Signs your shears need sharpening include difficulty cutting through mats, tugging rather than cutting cleanly, and increased grooming time. You can maintain edge sharpness between sharpenings by wiping blades after each use and storing them properly. Dull shears can pull hair and cause discomfort to your pet.
What's the best way to prevent rust on grooming tools?
Prevent rust by applying blade oil to metal components after cleaning and drying. Store tools in a dry environment away from humidity, ideally in a sealed grooming kit or case. Wipe tools dry immediately after washing and never leave them wet. For stainless steel tools, regular lubrication creates a protective barrier. If rust spots appear, clean them with a soft cloth and oil immediately. Proper storage and consistent maintenance extend tool longevity significantly.
Can you use rubbing alcohol to clean pet grooming clippers?
Yes, rubbing alcohol is effective for disinfecting clipper blades and heads. Apply it with a cloth or brush to metal surfaces, then wipe dry. However, avoid soaking electric clippers or allowing alcohol to seep into the motor housing. For tools with ceramic or diamond grinding heads, alcohol is safe and won't damage the material. Always ensure tools are completely dry before use or storage to prevent corrosion and maintain hygiene standards.

